Watercolor Valentine PNG Splashes 4: Practical Design Assets for Creative Workflows
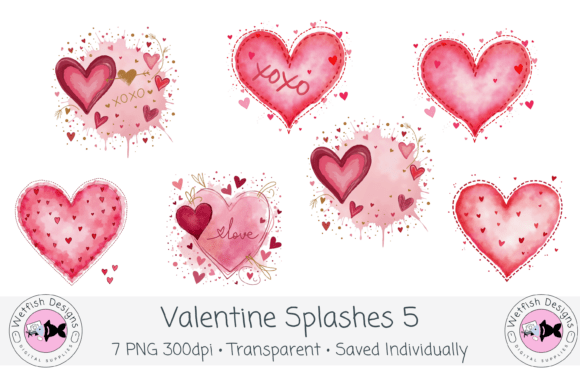
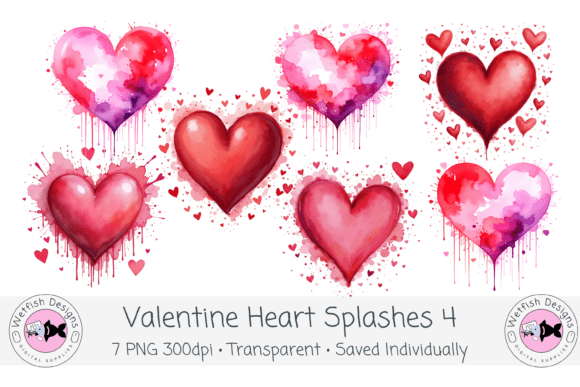
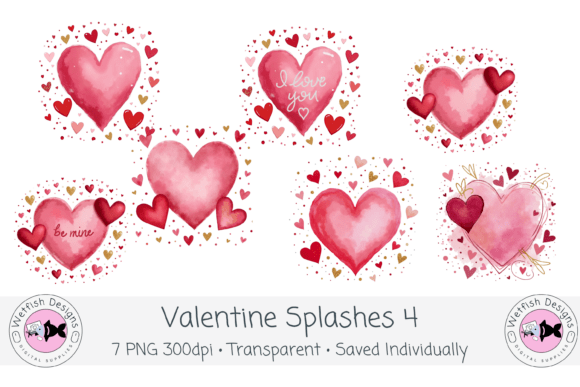
Digital design assets are only as valuable as the workflows they support. When you work with layered compositions, print-on-demand products, or social media graphics, the quality and format of your source files directly affect how efficiently you can move from concept to final output. Watercolor Valentine PNG Splashes 4 is a clipart set built around that exact need: seven hand-painted heart splash designs in blush, pink, and red, with doodled hearts, gold-style accents, and romantic typography elements. Each file is a high-resolution PNG at 300 DPI with a transparent background, saved individually for direct integration into both digital and print projects.
This article walks through how this set fits into real creative and business workflows—before you start a project, during the design process, and when preparing files for production or publication. You will find practical implementation tips, platform-specific guidance, and observations on asset management that help you get consistent, professional results without unnecessary rework.
What the Set Actually Contains
Understanding what you have in hand is the first step to using it effectively. The set includes seven individual PNG files. Each one is a standalone splash element with a transparent background, saved at 300 DPI. The resolution matters because it gives you flexibility: you can scale the elements up for large-format prints or down for digital graphics without losing sharpness or introducing artifacts.
The color palette centers on blush, pink, and red, with gold-style detailing on some elements. The designs combine soft watercolor splashes with line-based doodled hearts and typography that leans romantic without being overly ornate. This combination means the assets work equally well as focal points on a greeting card or as subtle overlays on a scrapbook page. Because the backgrounds are transparent, you can layer them over patterned paper, photographs, solid colors, or textured backgrounds without additional masking work.
File Formats and Resolution
All files are PNG with transparent backgrounds. No layering is baked into a single file—each splash is its own PNG. This is deliberate: it gives you control over positioning, scale, and opacity for each element independently. The 300 DPI resolution meets standard print requirements, so you can use these directly in print-on-demand products, sublimation transfers, or physical prints without upscaling. For digital use, the resolution also means you can reduce the file size for web use without degrading quality.
Where Watercolor Valentine PNG Splashes 4 Fits in Your Workflow
Design assets serve different purposes depending on where you are in a project. This set is flexible enough to be used at nearly any stage, but understanding exactly when and how to bring it in can save time and reduce trial and error.
Before You Start: Planning and Asset Preparation
Preparation is often overlooked, but it directly affects how smoothly a project runs. Before you open your design software, take a few minutes to organize the seven PNG files in a way that matches your project structure. Create a folder for this set, and consider renaming the files with descriptive labels like “splash-large-blush” or “doodle-hearts-gold” rather than keeping generic filenames. This small step reduces time spent hunting for the right element later.
If you work with templates in Canva, Procreate, or Affinity, you can also pre-load the PNGs into your asset library or stamp brush system. For Procreate users, importing these as individual layers in a practice canvas lets you test how they interact with different brushes and blending modes before committing to a final layout. For Canva, uploading them as “uploads” and grouping them in a folder keeps them accessible across all your designs. This upfront investment of ten minutes pays for itself in faster execution later.
During the Design Process: Layering and Composition
The real strength of transparent PNGs is the ability to layer them without compromising the texture of the watercolor effect. When you place one of these splashes over a background, the watercolor edges remain soft and organic because the transparency is baked into the file itself—no harsh white borders to contend with.
One effective technique is to use the splashes as background elements at reduced opacity (30–50%) and then bring a second splash forward at full opacity as a focal point. This creates depth without visual clutter. The gold-style accents and doodled hearts are particularly useful here: they can serve as subtle details that catch the eye without dominating the composition. For example, you might place a large pink splash behind your main text, then layer a smaller gold-accented splash near the title to draw attention.
If you are designing for sublimation or print-then-cut, remember that the transparent background means you can position these elements directly over your product mockup without additional clipping masks. This is a time-saver when you are iterating on multiple product variations.
After the Design: Export and Production
Once your layout is final, the PNG files themselves don’t require any special handling. However, the transparency does affect how you export your final composition. If you are saving a composite file that includes these splashes alongside other elements, use PNG or a layered file format (PSD, TIFF, or native format) to preserve the transparency of the splashes. For print production, exporting as a high-resolution PDF or PNG at 300 DPI ensures the watercolor detail remains intact.
For KDP interiors, printables, or sublimation files, test your final export on a small scale first. Place the design over a dark background in preview mode to confirm that no unintended artifacts appear around the splash edges. Because the original PNGs are clean, this is rarely an issue, but it is a quick quality check that saves reprinting costs.
Platform-Specific Implementation Tips
Different tools handle PNG layers in slightly different ways. Here is how to get the best results from this set across the most common platforms used by creators and small business owners.
Canva
Upload the PNGs to Canva as image files. Once uploaded, you can resize, rotate, and adjust opacity just like any other element. Because Canva treats PNGs with transparent backgrounds as full images, you can layer them over text, shapes, and other images without issue. For faster access, create a folder within Canva’s “Brand Kit” or “Uploads” section labeled “Valentine Splashes” and keep all seven files there. This is especially useful if you create multiple designs for the same campaign or product line.
Procreate
Import each PNG as a separate layer. The transparent background will be preserved, so the splash sits directly on your canvas without a white fill. You can then use the Gaussian blur or motion blur on individual splash layers to create soft, atmospheric backgrounds. The doodled hearts and gold accents are crisp enough to remain legible even when blurred. If you want to use a splash as a clipping mask for a texture or pattern, duplicate the layer, set it to “Alpha Lock,” and fill with your desired content—the watercolor edge stays intact.
Cricut and Silhouette Print-Then-Cut
For print-then-cut projects, the transparent background is critical. When you upload the PNG to Cricut Design Space or Silhouette Studio, make sure you select “Print Then Cut” and confirm that the background remains transparent. This lets you position the splash anywhere on your canvas without a white box around it. Because the files are individual PNGs, you can also combine multiple splashes in a single print layout before cutting, which maximizes your material usage.
Organization and Asset Management for Long-Term Use
If you build a library of design assets over time, how you organize them directly affects how often you actually use them. This set is small—seven files—but it belongs to a larger category of watercolor and romantic-style elements. Consider adopting a folder structure that groups assets by color palette, theme, or format. For example:
- Assets / Watercolor / Valentine / PNG
- Assets / Watercolor / Valentine / Doodle
- Assets / Watercolor / Valentine / Gold-Accent
This kind of structure scales well as your library grows. You can also tag files with keywords in your operating system or in a digital asset management tool if you work with hundreds of elements. The key is to make retrieval frictionless—if you have to dig through folders to find a splash, you are less likely to use it.
Quality Control: What to Check Before Finalizing
Even with professionally prepared PNGs, a few quick checks prevent surprises. When you place a splash into a composition, zoom to 100% and examine the edges. Watercolor textures can sometimes create very subtle semi-transparent pixels that look fine at full resolution but might behave unexpectedly when scaled down significantly. If you are using a splash at a very small size—say, as a tiny accent on a sticker sheet—check that the edges remain clean and that the watercolor effect does not become muddy.
Also verify the color profile. The PNGs are likely sRGB, which is standard for web and most print workflows. If you are printing commercially, confirm with your printer whether they require CMYK or accept sRGB PNGs. When in doubt, convert the final composite file to CMYK after placing the PNGs, and check for any color shifts, especially in the pink and red tones.
Practical Use Cases Across Different Projects
The versatility of this set comes from the balance between the soft watercolor texture and the structured doodle elements. Here are a few concrete scenarios:
Greeting Cards and Invitations
Use a large splash as a background element behind the main text. Layer a smaller splash with a gold accent near the fold or the flap. The transparent background means you can print on colored cardstock and the watercolor effect will show through naturally.
Digital Scrapbooking and Memory Keeping
Place splashes behind photo blocks to create depth without overlapping the image itself. The doodled hearts work well as corner accents or as connectors between journaling spots and photos. Because the files are separate, you can adjust each one’s opacity to match the mood of the layout.
Planners and Stickers
In digital planners, use the splashes as decorative headers for weekly spreads. For physical sticker sheets, arrange multiple splashes on a single print-then-cut page, then cut around them. The watercolor texture holds up well on matte sticker paper.
Social Media Graphics
For Instagram posts or Pinterest pins, the splashes add a tactile, handcrafted feel without requiring custom illustration. Place a splash behind a short quote or a product image to create contrast against clean typography. The gold accents work particularly well on dark backgrounds.
Final Observations on Integration and Efficiency
Design assets like Watercolor Valentine PNG Splashes 4 are most valuable when they reduce the time between concept and completed piece. The seven files in this set are self-contained, high-resolution, and ready to layer—no additional editing required. Whether you are preparing a batch of Valentine’s Day products for your Etsy shop, designing a set of matching social media posts, or building a scrapbook layout, these elements integrate directly into the tools you already use.
The key to making the most of any digital asset set is preparation. Organize the files before you start, test them on your intended background, and export at the correct resolution for your output medium. When you do that, you free yourself to focus on composition, color balance, and messaging—the parts of design that actually drive engagement and sales.
If you are building a reusable library of seasonal assets, sets like this one are worth organizing alongside other watercolor, botanical, or romantic elements so you can mix and match across years and projects. That is where the long-term value lives: not in a single project, but in a growing collection that makes your creative workflow faster and more reliable with each new asset you add.